Return to Course Home Page
jupyter setup for EDS 217
Jupyter Notebooks
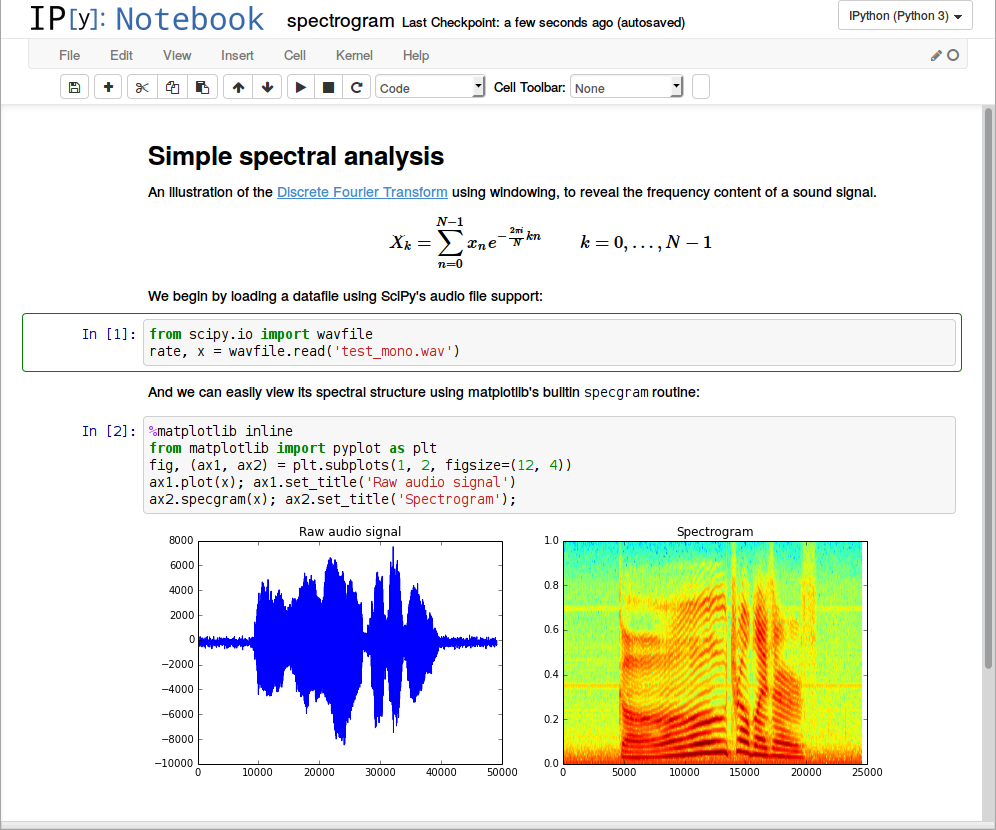
Jupyter notebooks are a very common approach for working in python data science. They have many of the same advantages as Rmd files, and can be exported into .pdf, .html, and even into pure python files (.py). While most IDEs can work with notebook files, the jupyter notebook server will always have the greatest amount of functionality and access to extensions that enhance the notebook experience (e.g. the RISE extension, which powers this class’s lecture slideshows)
Launching the Jupyter Notebook Server
You can launch a server locally very easily at the command line:
Open a terminal
Windows: Open PowerShell or Command Prompt
Mac/Linux: Open Terminal
Activate the EDS217_2023 environment
conda activate eds217_2023Change directory to the root of the class repository
cd path/to/eds217_2023Note: Your path will be different depending on where you cloned your repo in the previous step.
You can find the path by right-clicking on the folder in the file explorer and selecting “Properties” (Windows) or “Get Info” (Mac).
Launch the server
jupyter notebookA browser window should open automatically. If it doesn’t, you can copy the URL from the terminal and paste it into your browser.
Basic Jupyter Notebook Usage
Your browser window should look something like this:
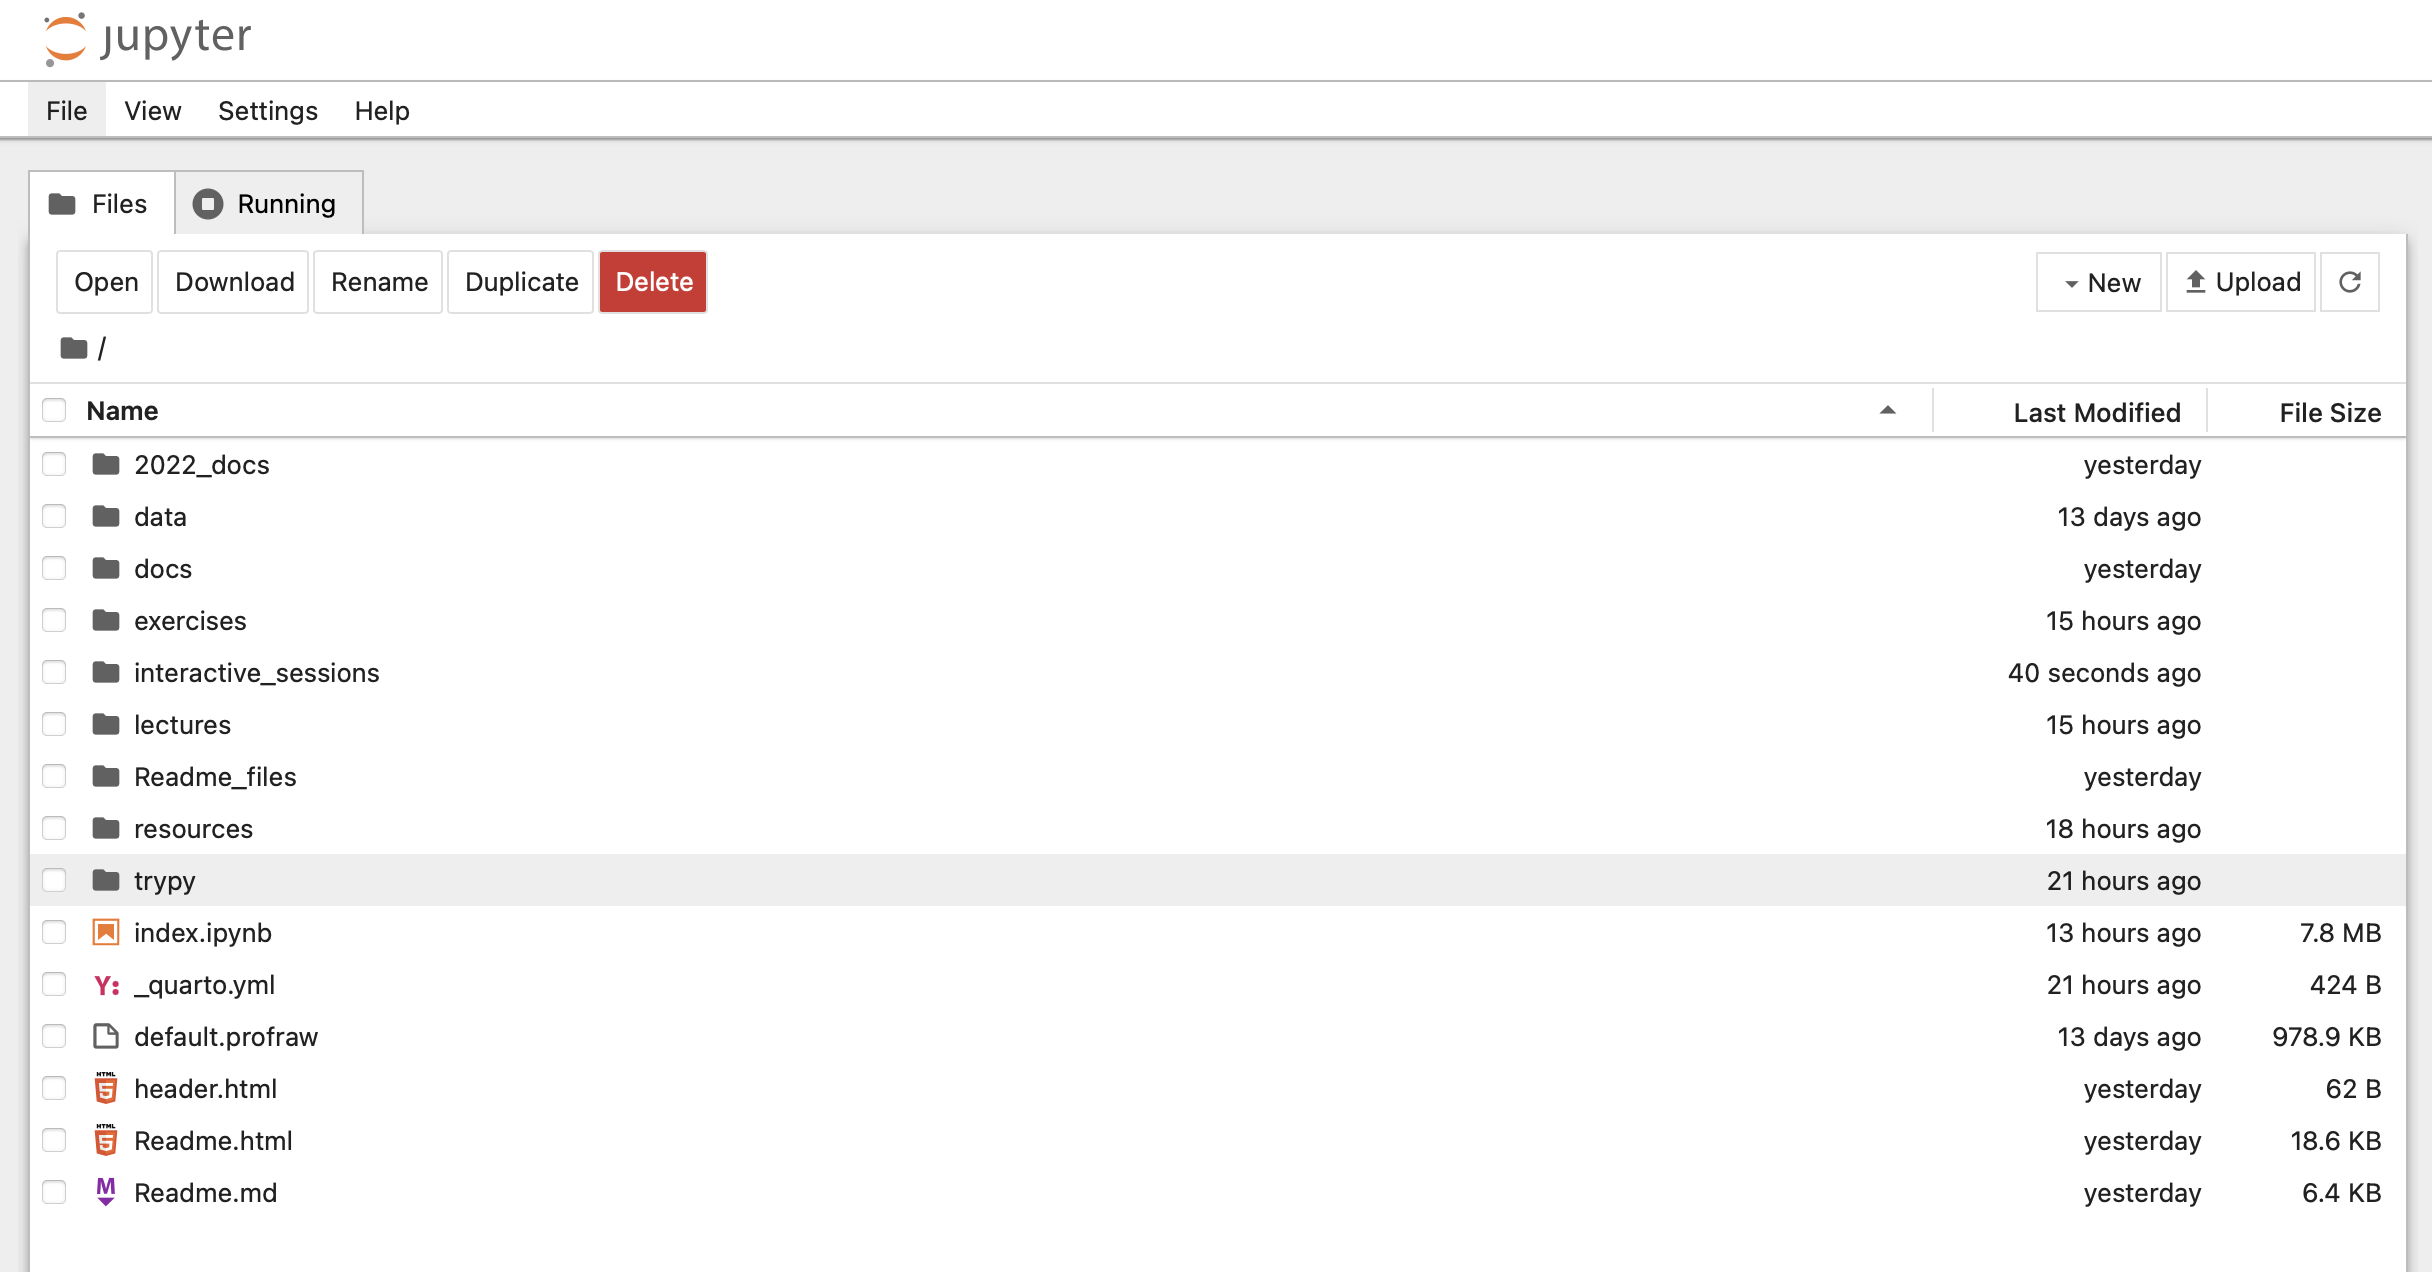
Let’s start by adding a new folder to the file browser. Click the “New” button in the upper right corner of the file browser, and select “Folder”.
Name the folder nbs. This is where you will store all of your notebooks for this class.
Once you’ve created the folder, click on it to enter it. You should see a blank file browser.
Creating a new notebook
You can create a new notebook by clicking the “New” button in the upper right corner of the file browser and selecting “notebook”. This will create a new notebook in the current directory. The default name is Untitled.ipynb. We can change that later, so for now, just open the file by clicking on it.
Selecting a kernel
A kernel is the “computational engine” that runs your notebook. It is the thing that actually executes the code you write. When you open a new notebook, you will be prompted to select a kernel. Select the eds217_2023 kernel. You can set our class environment as the default kernel by clicking the “Always start the preferred kernel” button.
The notebook interface
If everything has gone to plan, you should now be seeing a browser window that looks a lot like this:
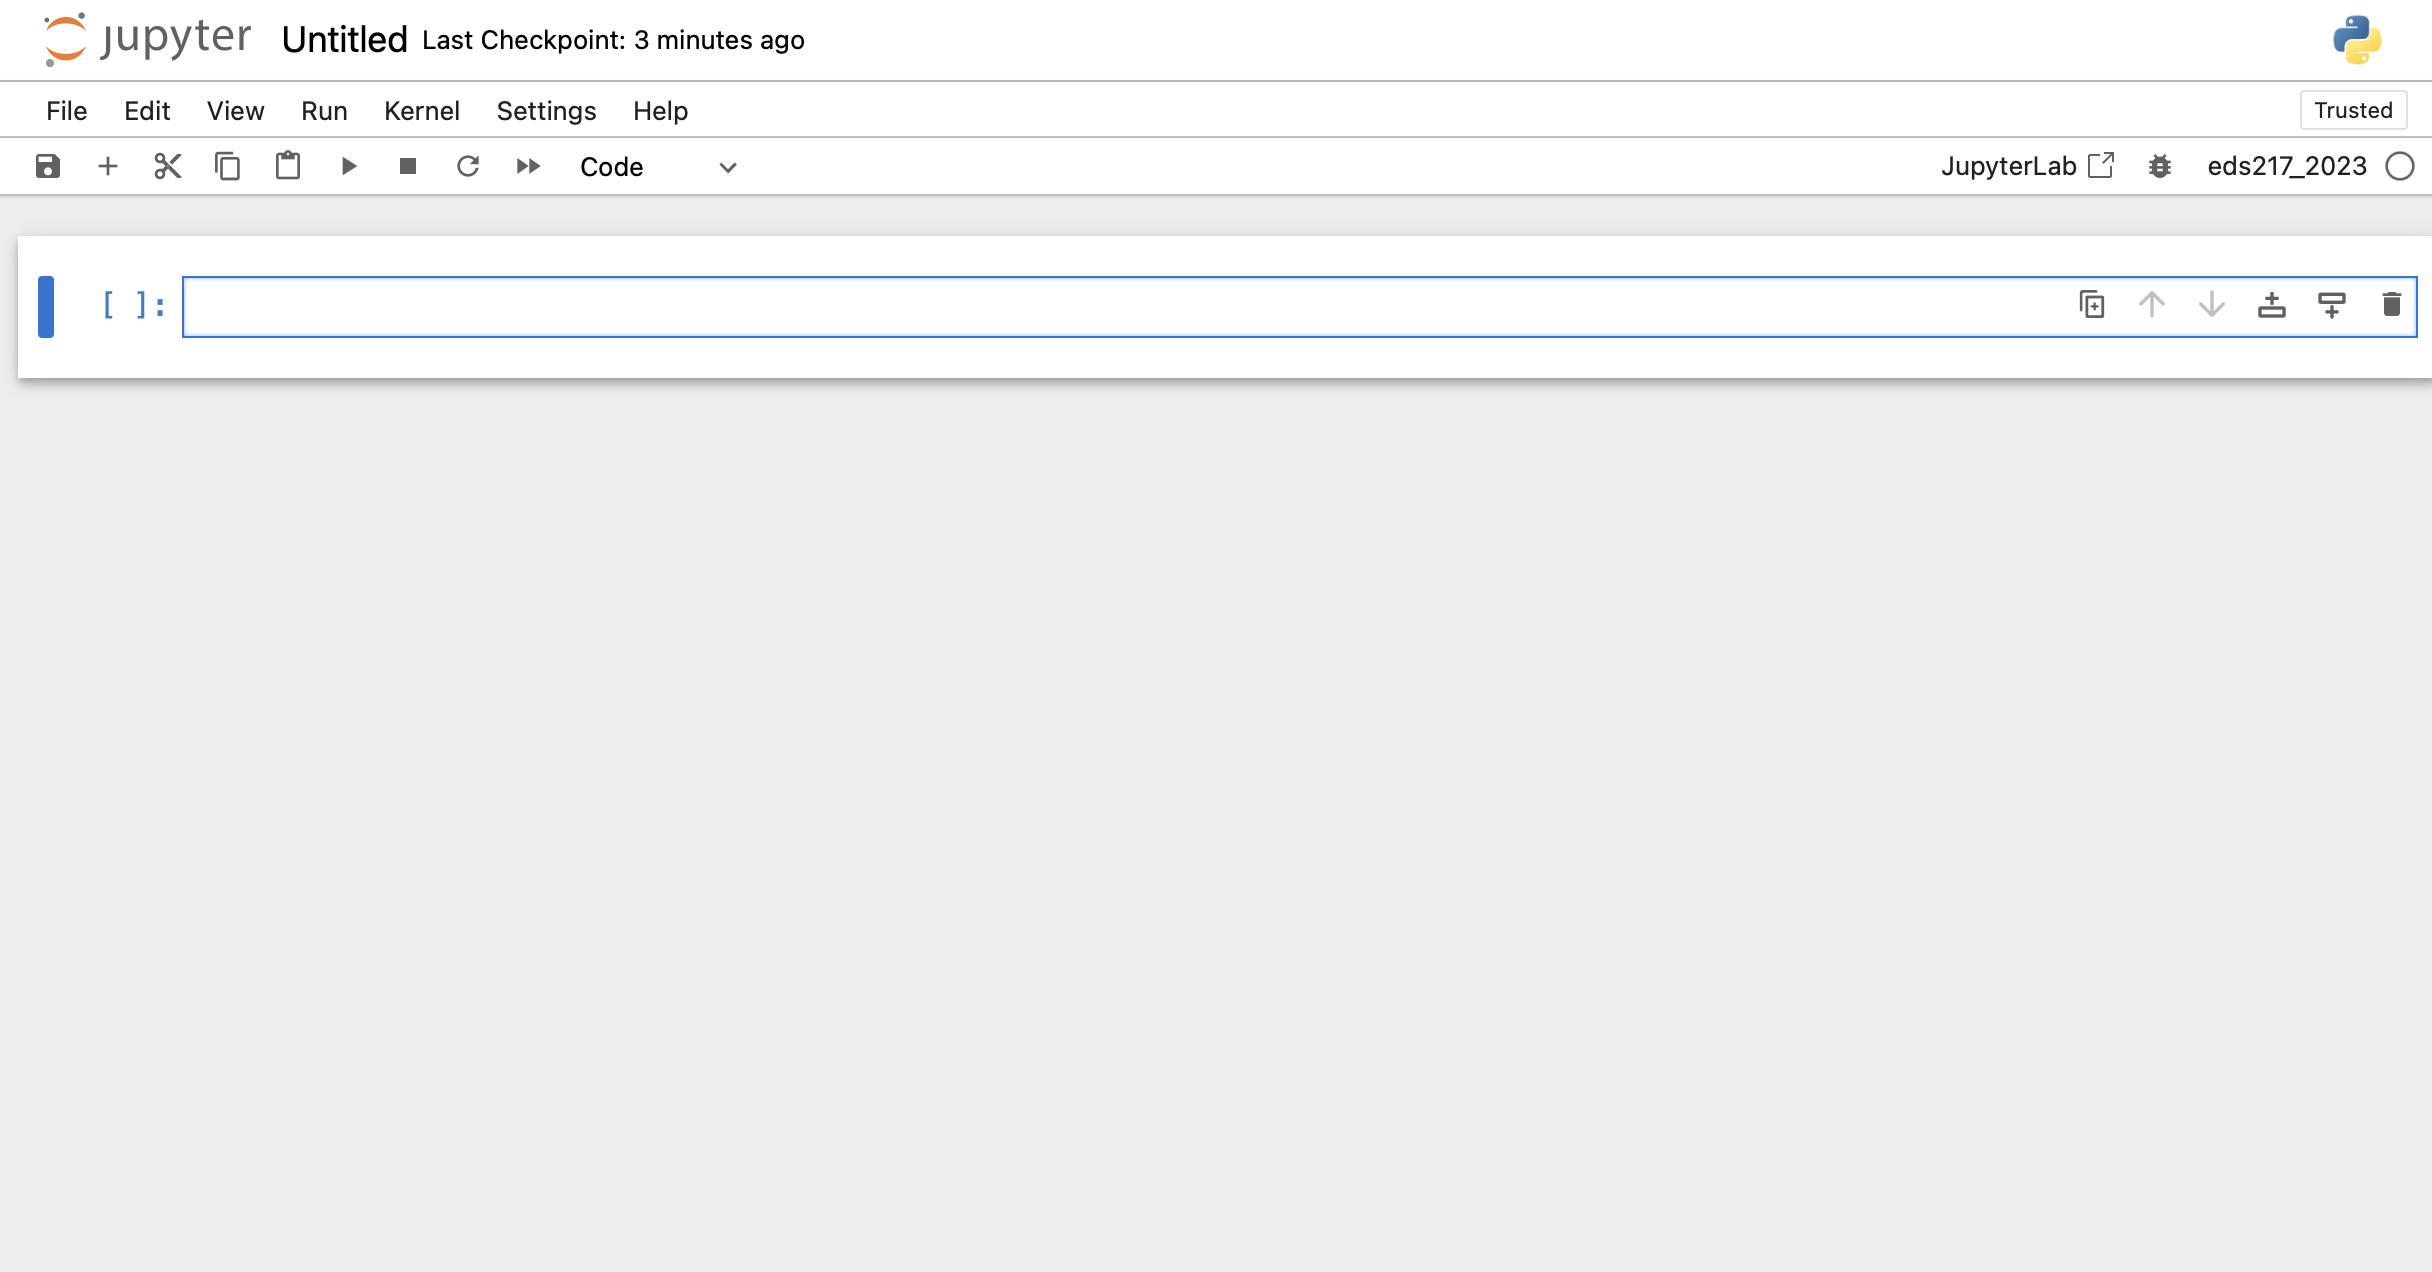
Let’s take a quick tour of the interface together.
The title bar
The title bar is the row of text at the top of the notebook. It contains the name of the notebook as well as the time since the last save (or “Checkpoint”). You can change the name of the notebook by clicking on the name and typing a new one.
Change the title of your notebook to test_environment
The toolbar
The toolbar is the row of buttons at the top of the notebook. It contains buttons for saving the notebook, adding cells, running cells, and more. We’ll go over these in more detail later. For now, the important point to notice is the text at the far right of the toolbar. It should say eds217_2023. This is the name of the kernel that is running your notebook. If you click on it, you can change the kernel (but don’t do that now!)
Saving a notebook
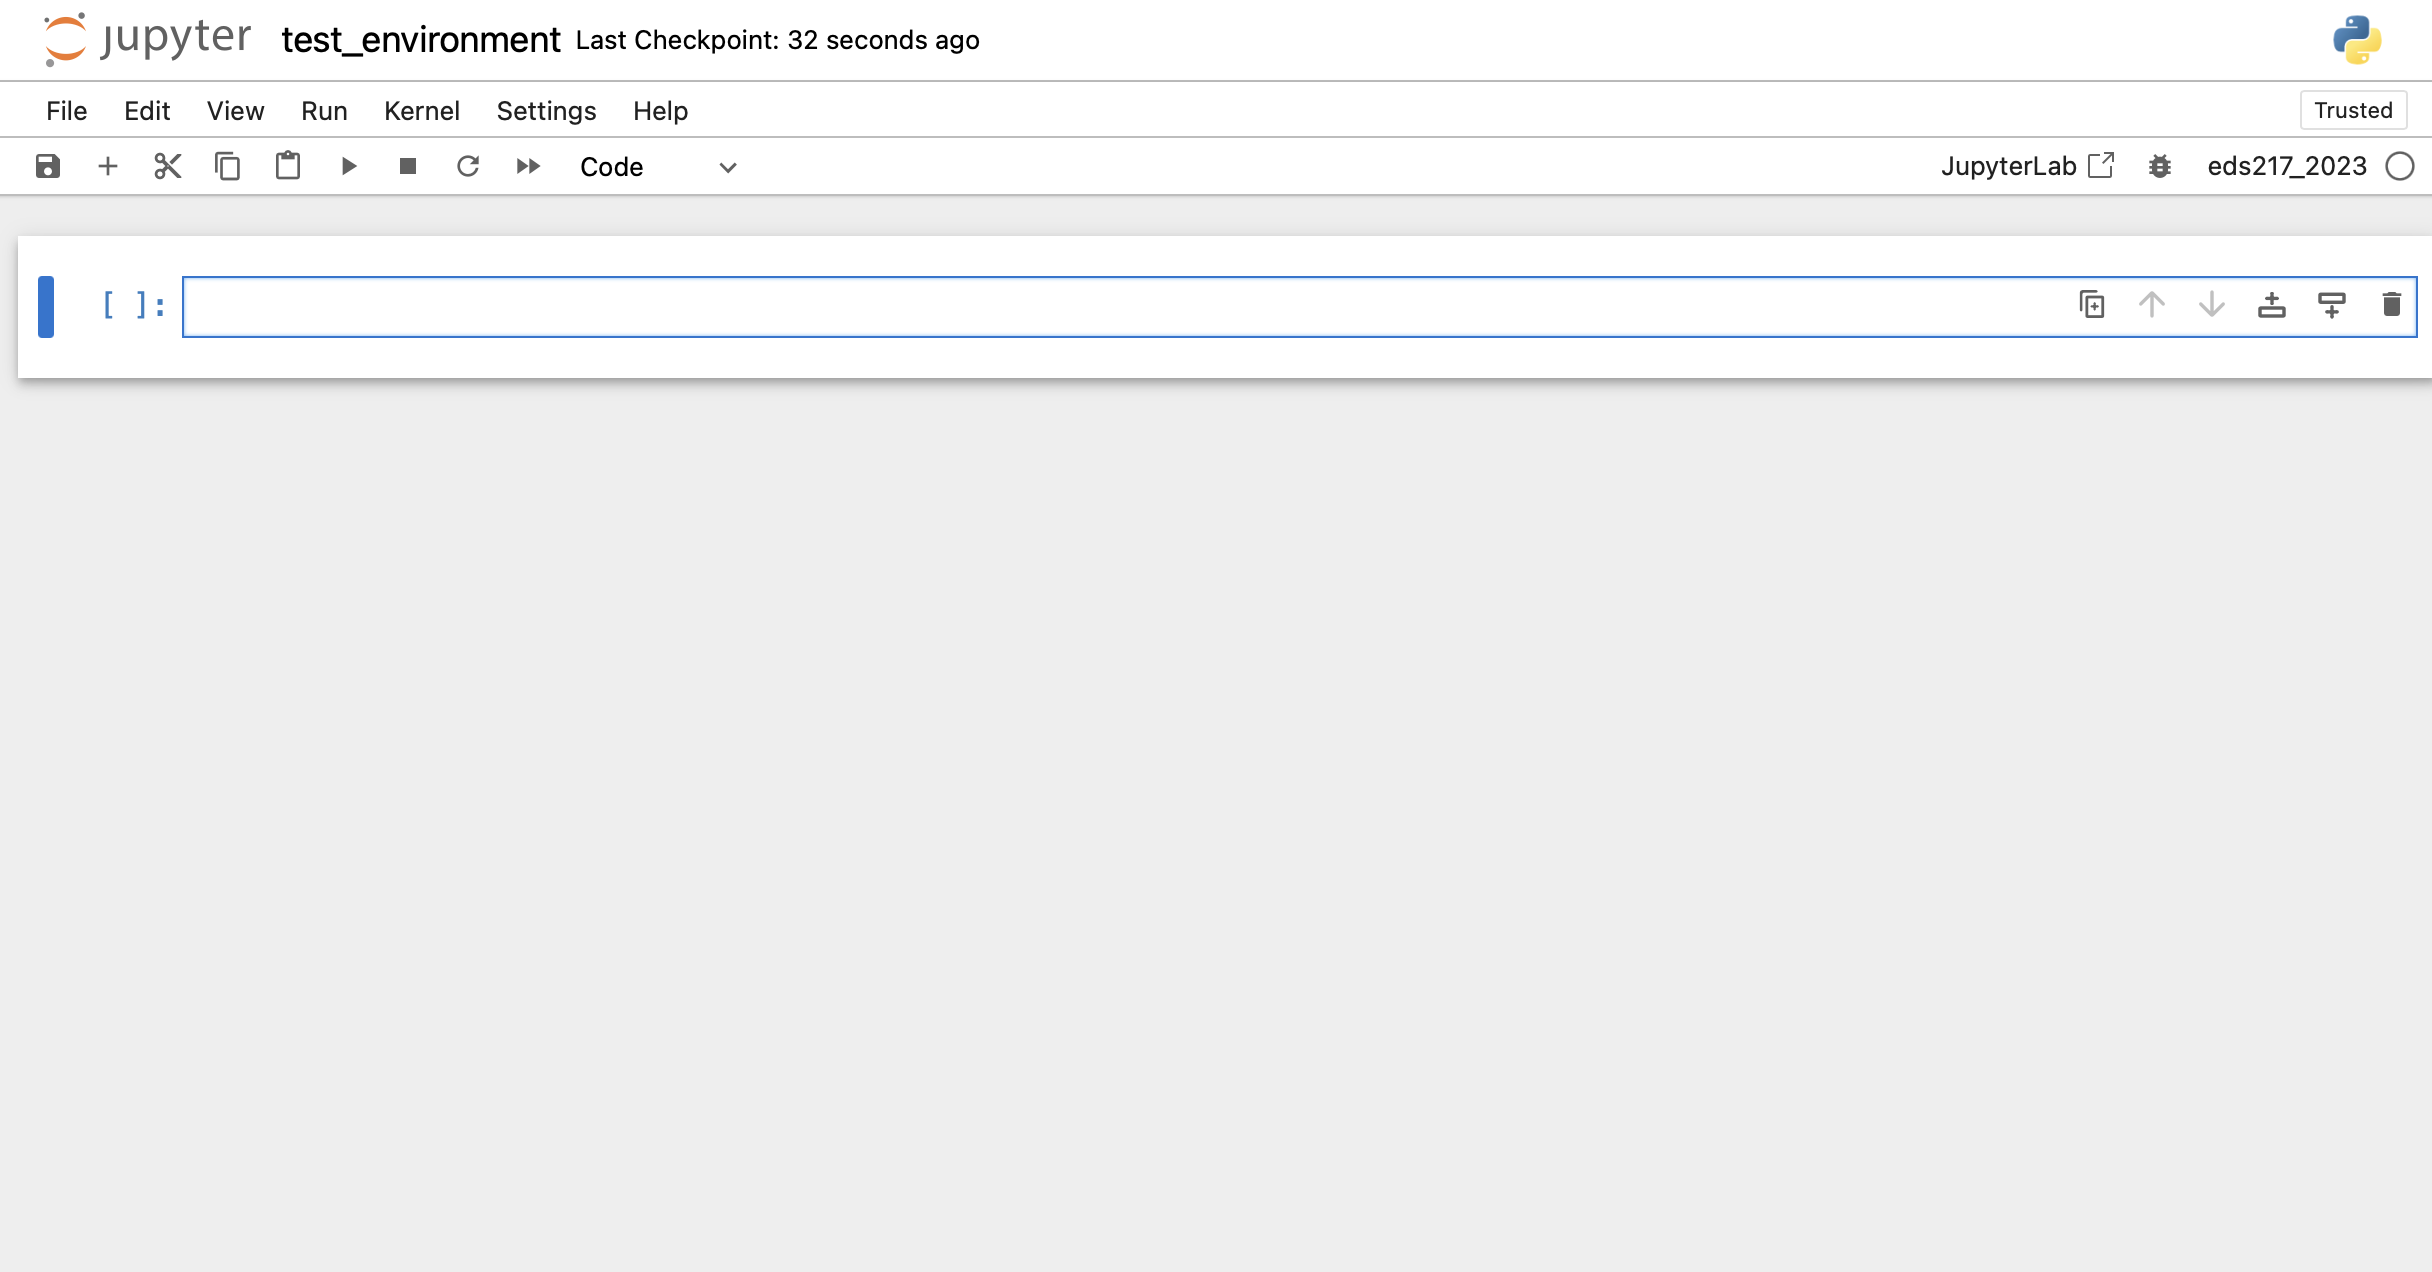
You save a notebook by clicking the “Save” button in the upper left corner of the toolbar (it looks like a floppy disk). Do this now. You will see the “Last Checkpoint” update:
Working with cells
There are two cell types in a jupyter notebook: code cells and markdown cells. Code cells are for writing code, and markdown cells are for writing text. You can change the type of a cell by clicking on the dropdown menu in the toolbar and selecting the type you want.
The notebook has been initialized with a single cell. You can tell it’s a code cell because it has [ ]: to the left of it. We want a markdown cell instead, so we can add a title to this notebook and describe what it’s for.
Change the cell type to markdown by clicking the dropdown menu in the toolbar and selecting “Markdown”
You can now type text into the cell. Try typing a title for the notebook and a short description of what it’s for. You can use markdown syntax to format the text. If you need a refresher on markdown syntax, you can find one here.

Running a cell
Once you’ve written your text, you can render it by running the cell. You can do this by clicking the “Run” button in the toolbar, or by pressing Shift+Enter. Do this now.

Note: You can always edit the cell again by double-clicking on it. Re-rendering the cell by running it again will update the cell output.
Adding a cell to a notebook
You can add a cell to a notebook by clicking the “+” button in the toolbar. This will add a cell below the currently selected cell.
You can also add a cell above +[] or below []+ the currently selected cell by clicking the buttons in the cell’s toolbar on the far right. These buttons have keyboard shortcuts (A) and (‘B’).
Press B to add a cell below the currently selected cell
The default new cell type is code.
Deleting a cell
You can delete a cell by clicking the scissors button in the toolbar. This will delete the currently selected cell. There is also a trashcan icon in the cell toolbar that will delete the cell. Finally, you can also use the keyboard shortcut D,D (press D twice).
Practice adding, deleting, and changing the type of cells until you are comfortable with the process
Testing our Environment
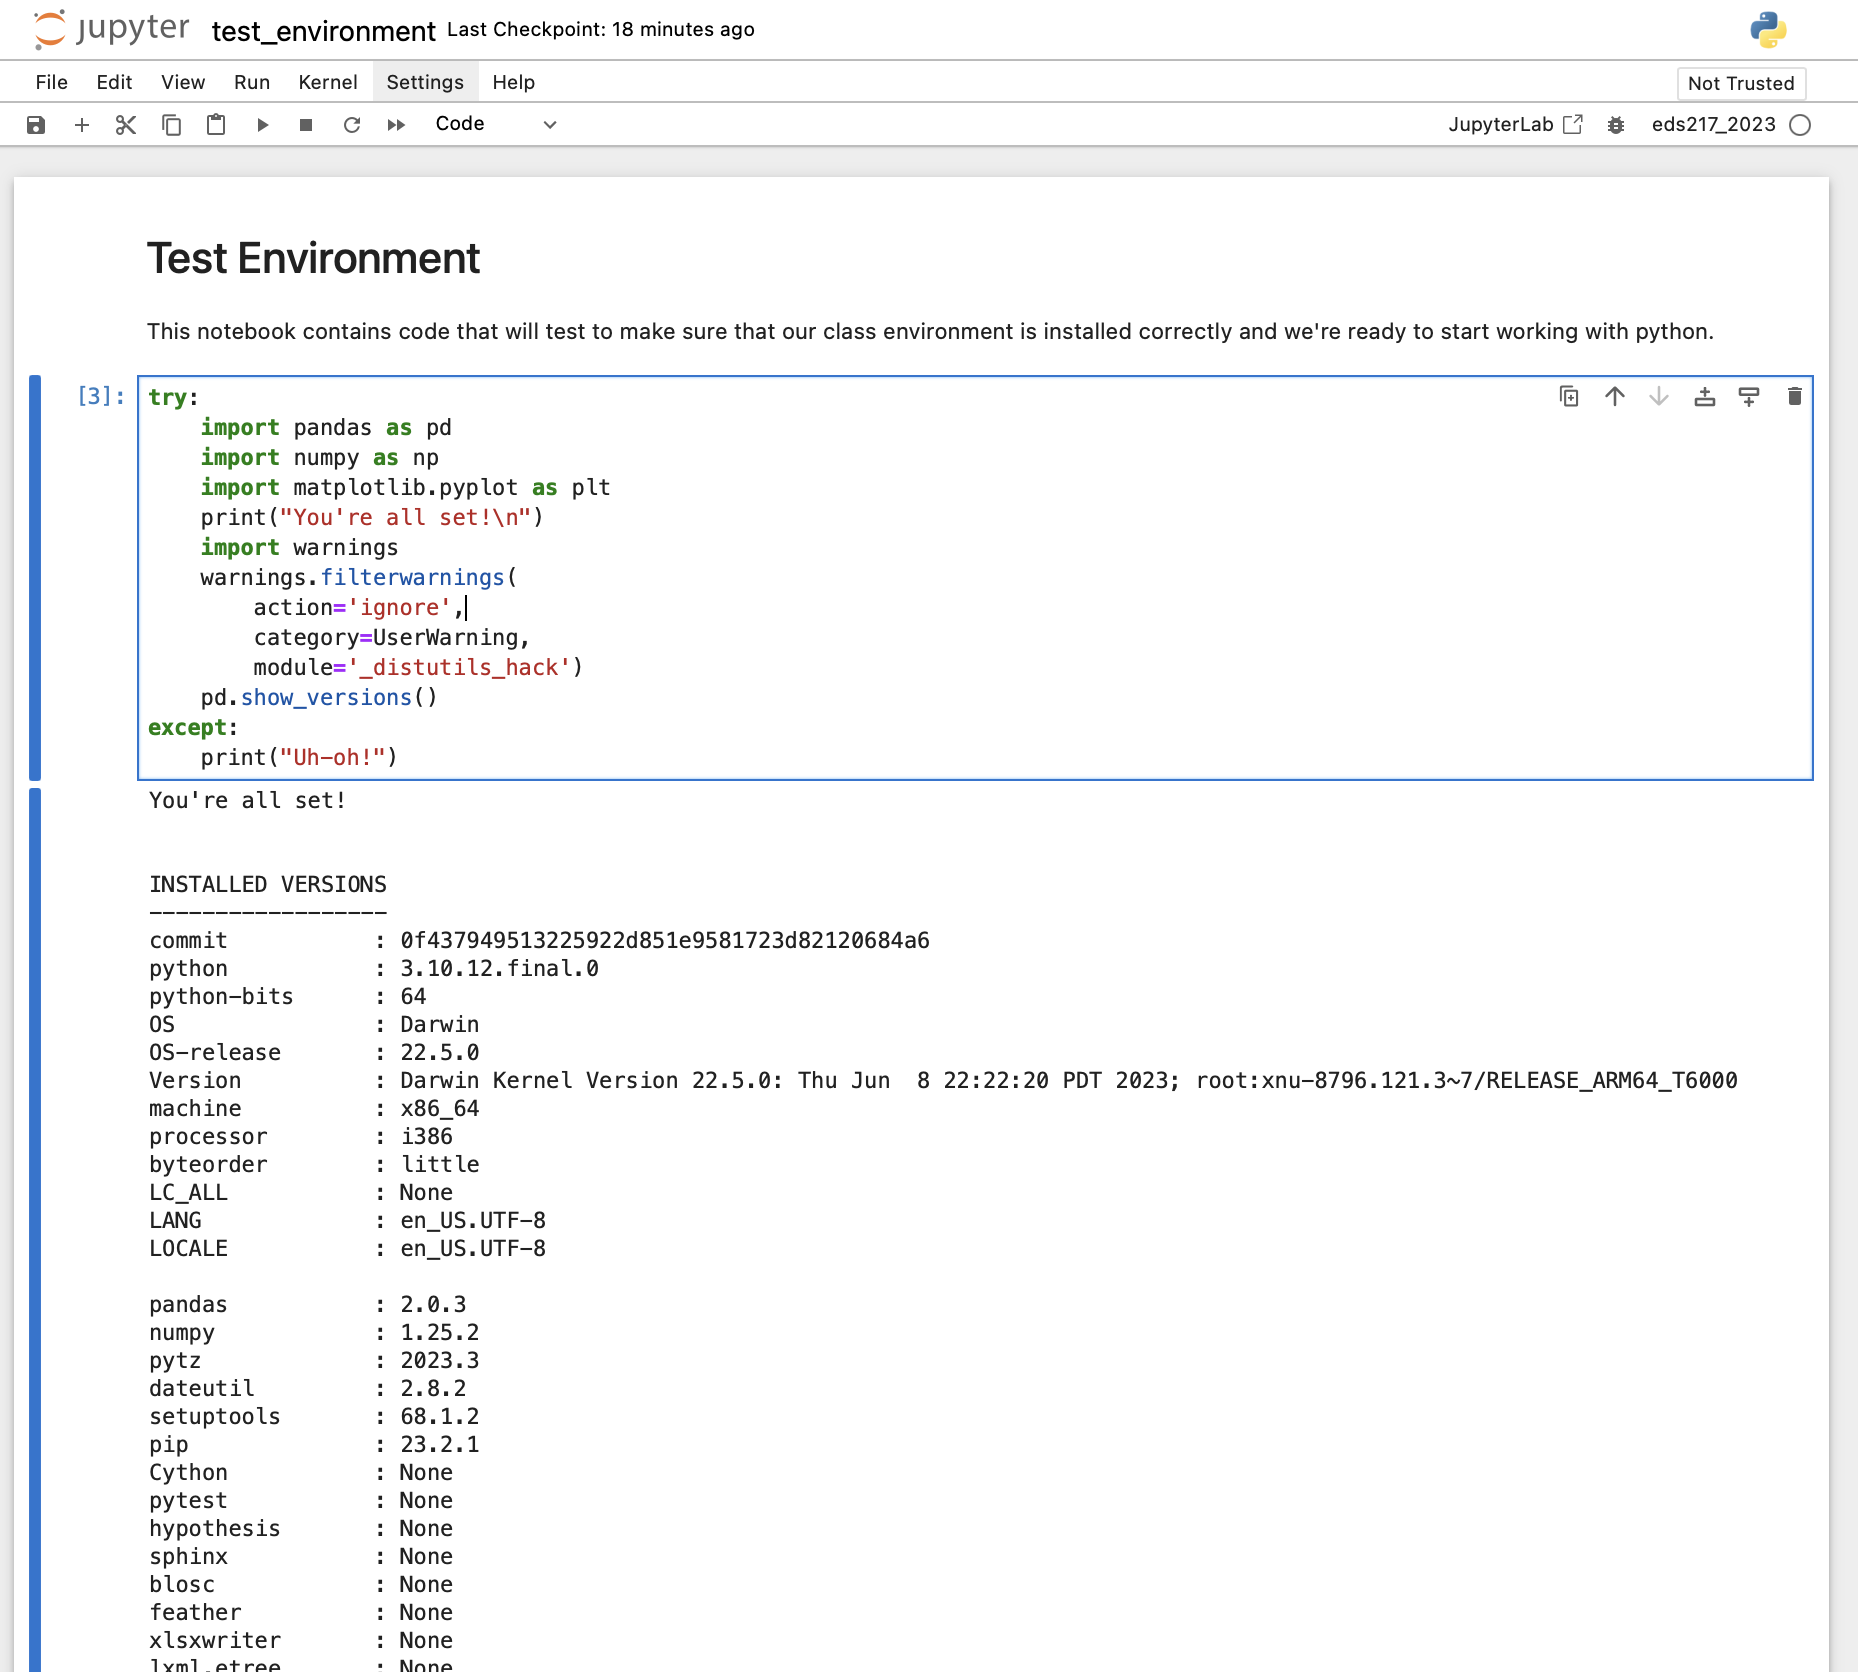
We are going to add code to the notebook to test that our environment is working correctly.
Here is the code we need to add:
try:
    import pandas as pd
    import numpy as np
    import matplotlib.pyplot as plt
    print("You're all set!\n")
    import warnings
    warnings.filterwarnings(
        action='ignore',
        category=UserWarning,
        module='_distutils_hack')
    pd.show_versions()
except:
    print("Uh-oh!")
Add this code to a new cell in your notebook and run it
Congratulations!?
Hopefully you now see something like this:
You’ve successfully run your first jupyter notebook!
If you see the message You're all set! then you’re ready to go. If you see Uh-oh! then something went wrong and you should ask for help.
Assuming you’re all set, you can now save your notebook and close it. You can stop the serverby clicking the “Shut Down” button in the file menu. You can also shut down the notebook server by closing the terminal window where you launched it. Be sure to close the browser window as well.